Aimee Kick
Interior Design Portfolio Sample
Quigley House Design Process

Welcome to Quigley House! My clients were a couple who had been living in a city apartment for years and were finally moving into their first house together. Their mismatched furniture and assorted hand-me-downs from friends and family left their home feeling crowded and unsettled. They brought me in to solve layout problems, determine their style, organize their belongings, and fully decorate and style their living room, dining room, and bonus room.
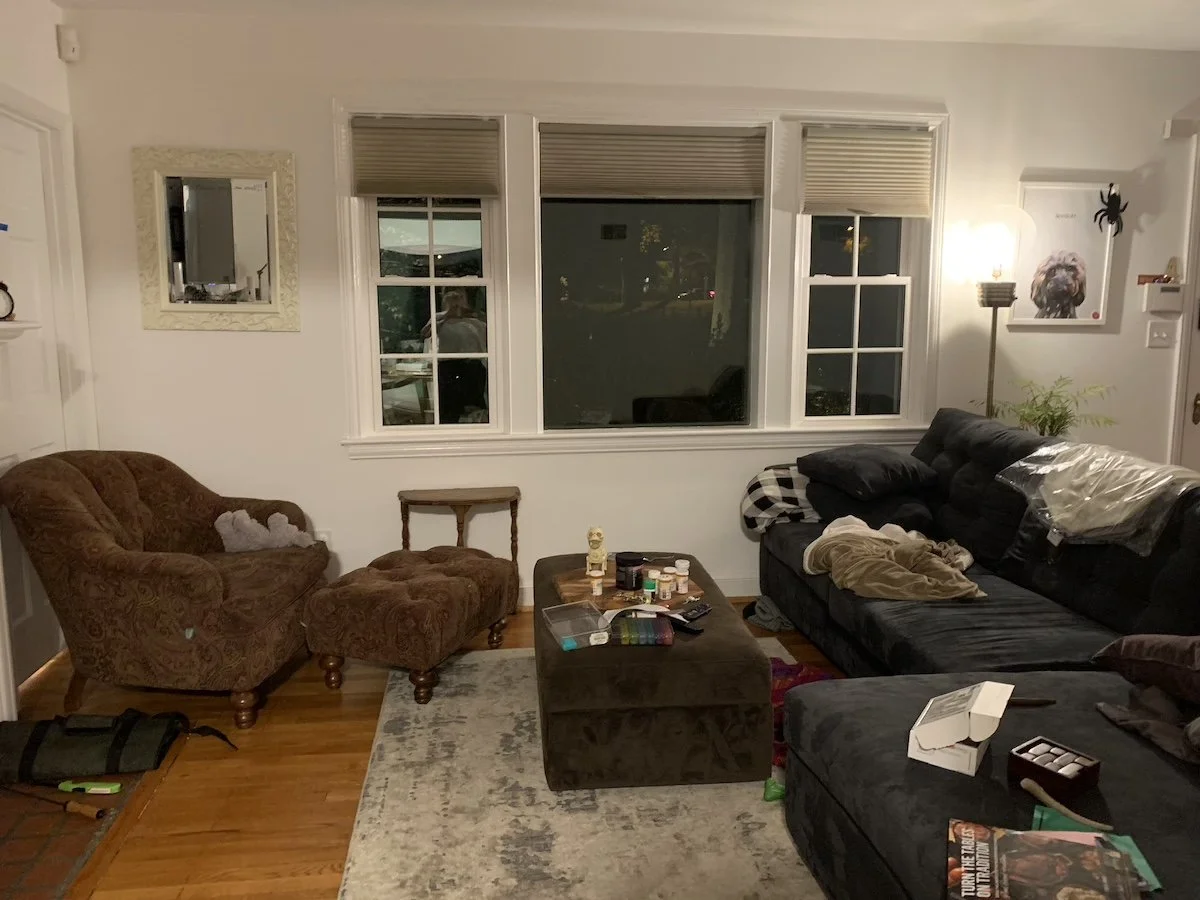
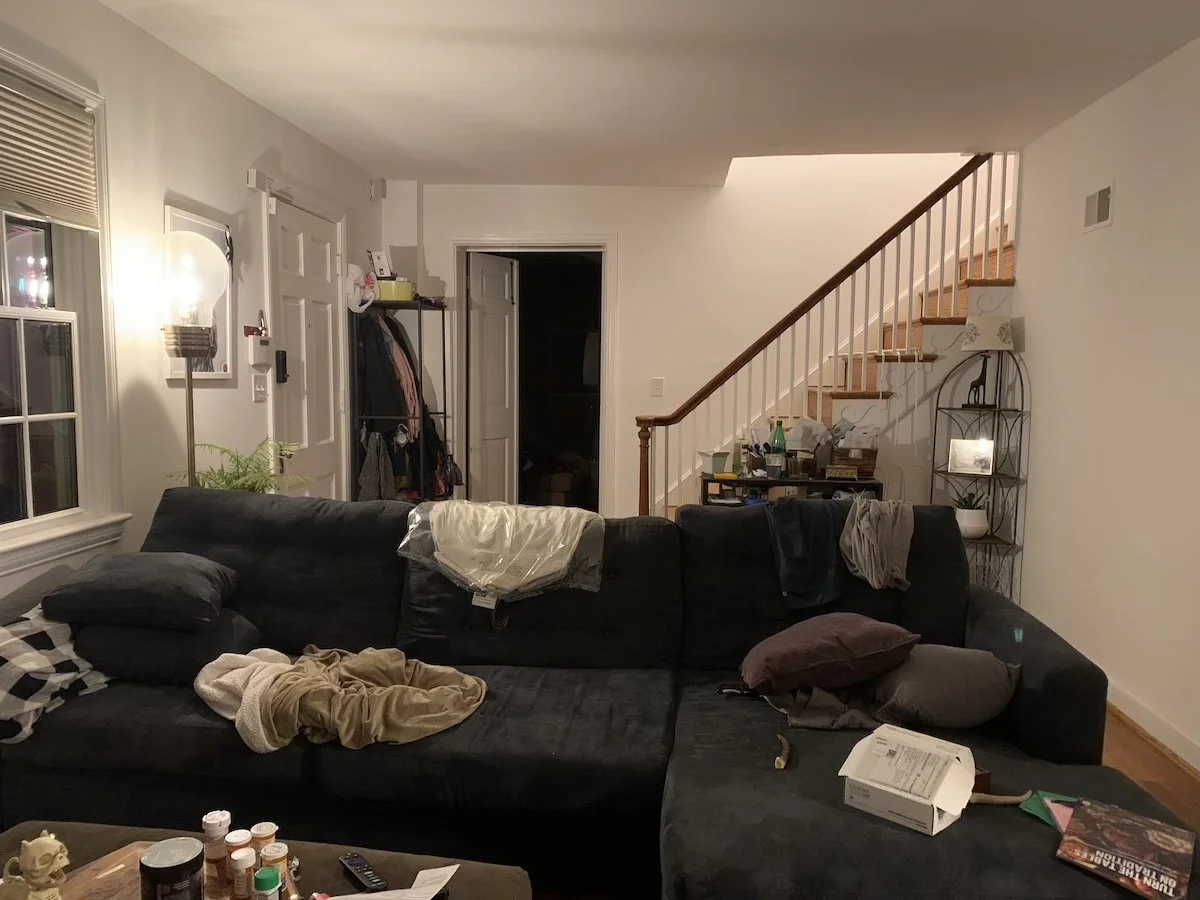
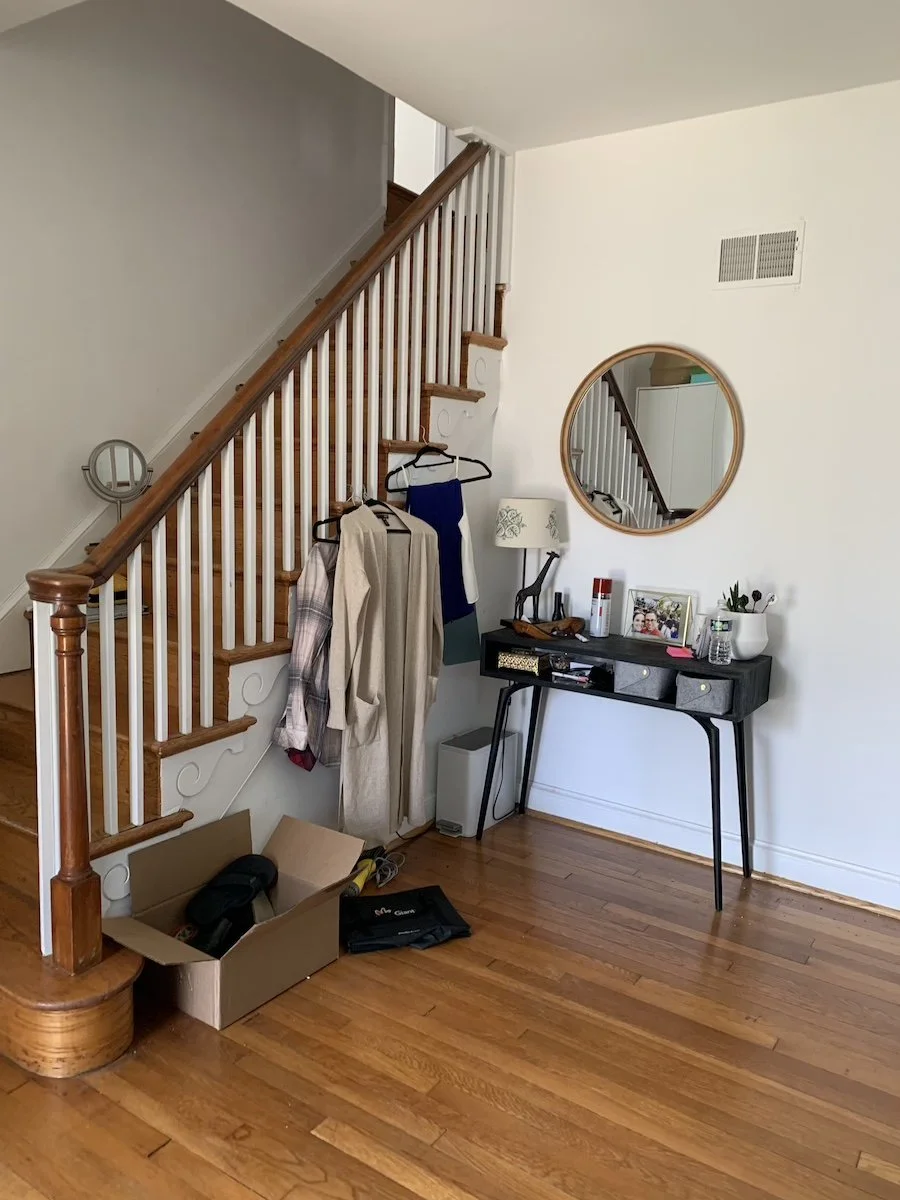
Before

Phase 1: Determining the Needs and Defining the Problem
Upon my first walk-through of the house, it was clear that my clients had challenges around clutter and disorganization. Most surfaces were piled up with clothes, papers, and household items. They knew that their home didn’t feel comfortable, but they didn’t know how to respond. I determined that their primary need was to declutter their home and establish a system of organization. This started with sending a copy of The Life Changing Magic of Tidying Up by Marie Kondo over as well as taking time to declutter each room with my clients before we started planning and purchasing items. Once we had established a general sense of order to the house, I could start sourcing furniture that was proportionate to each room, spoke to their functional needs, and add art and color. My main challenge was creating a design that would not be easily overpowered by things being out of order. I knew most of the design and decor needed to come from permanent elements like wall decor and furniture, and to make each room slightly under-decorated to accomodate the inevitable additions that my clients would be adding.
Phase 2: Establishing The Style Direction

My clients did not know what their style or preferences were, and were quick to defer to my judgement. After spending time with them through the decluttering process, I could tell that they were unserious, laid-back, and liked things that were slightly unexpected.
I used the above photo of Sara Fritsch’s home as a touch point for my clients to see that a clean, minimal home could still feel fun and cheerful. I then started sourcing furniture that had clean lines and neutral finishes. After establishing a calm base layer, I then worked to find ways to bring in color without accentuating the feeling of clutter.
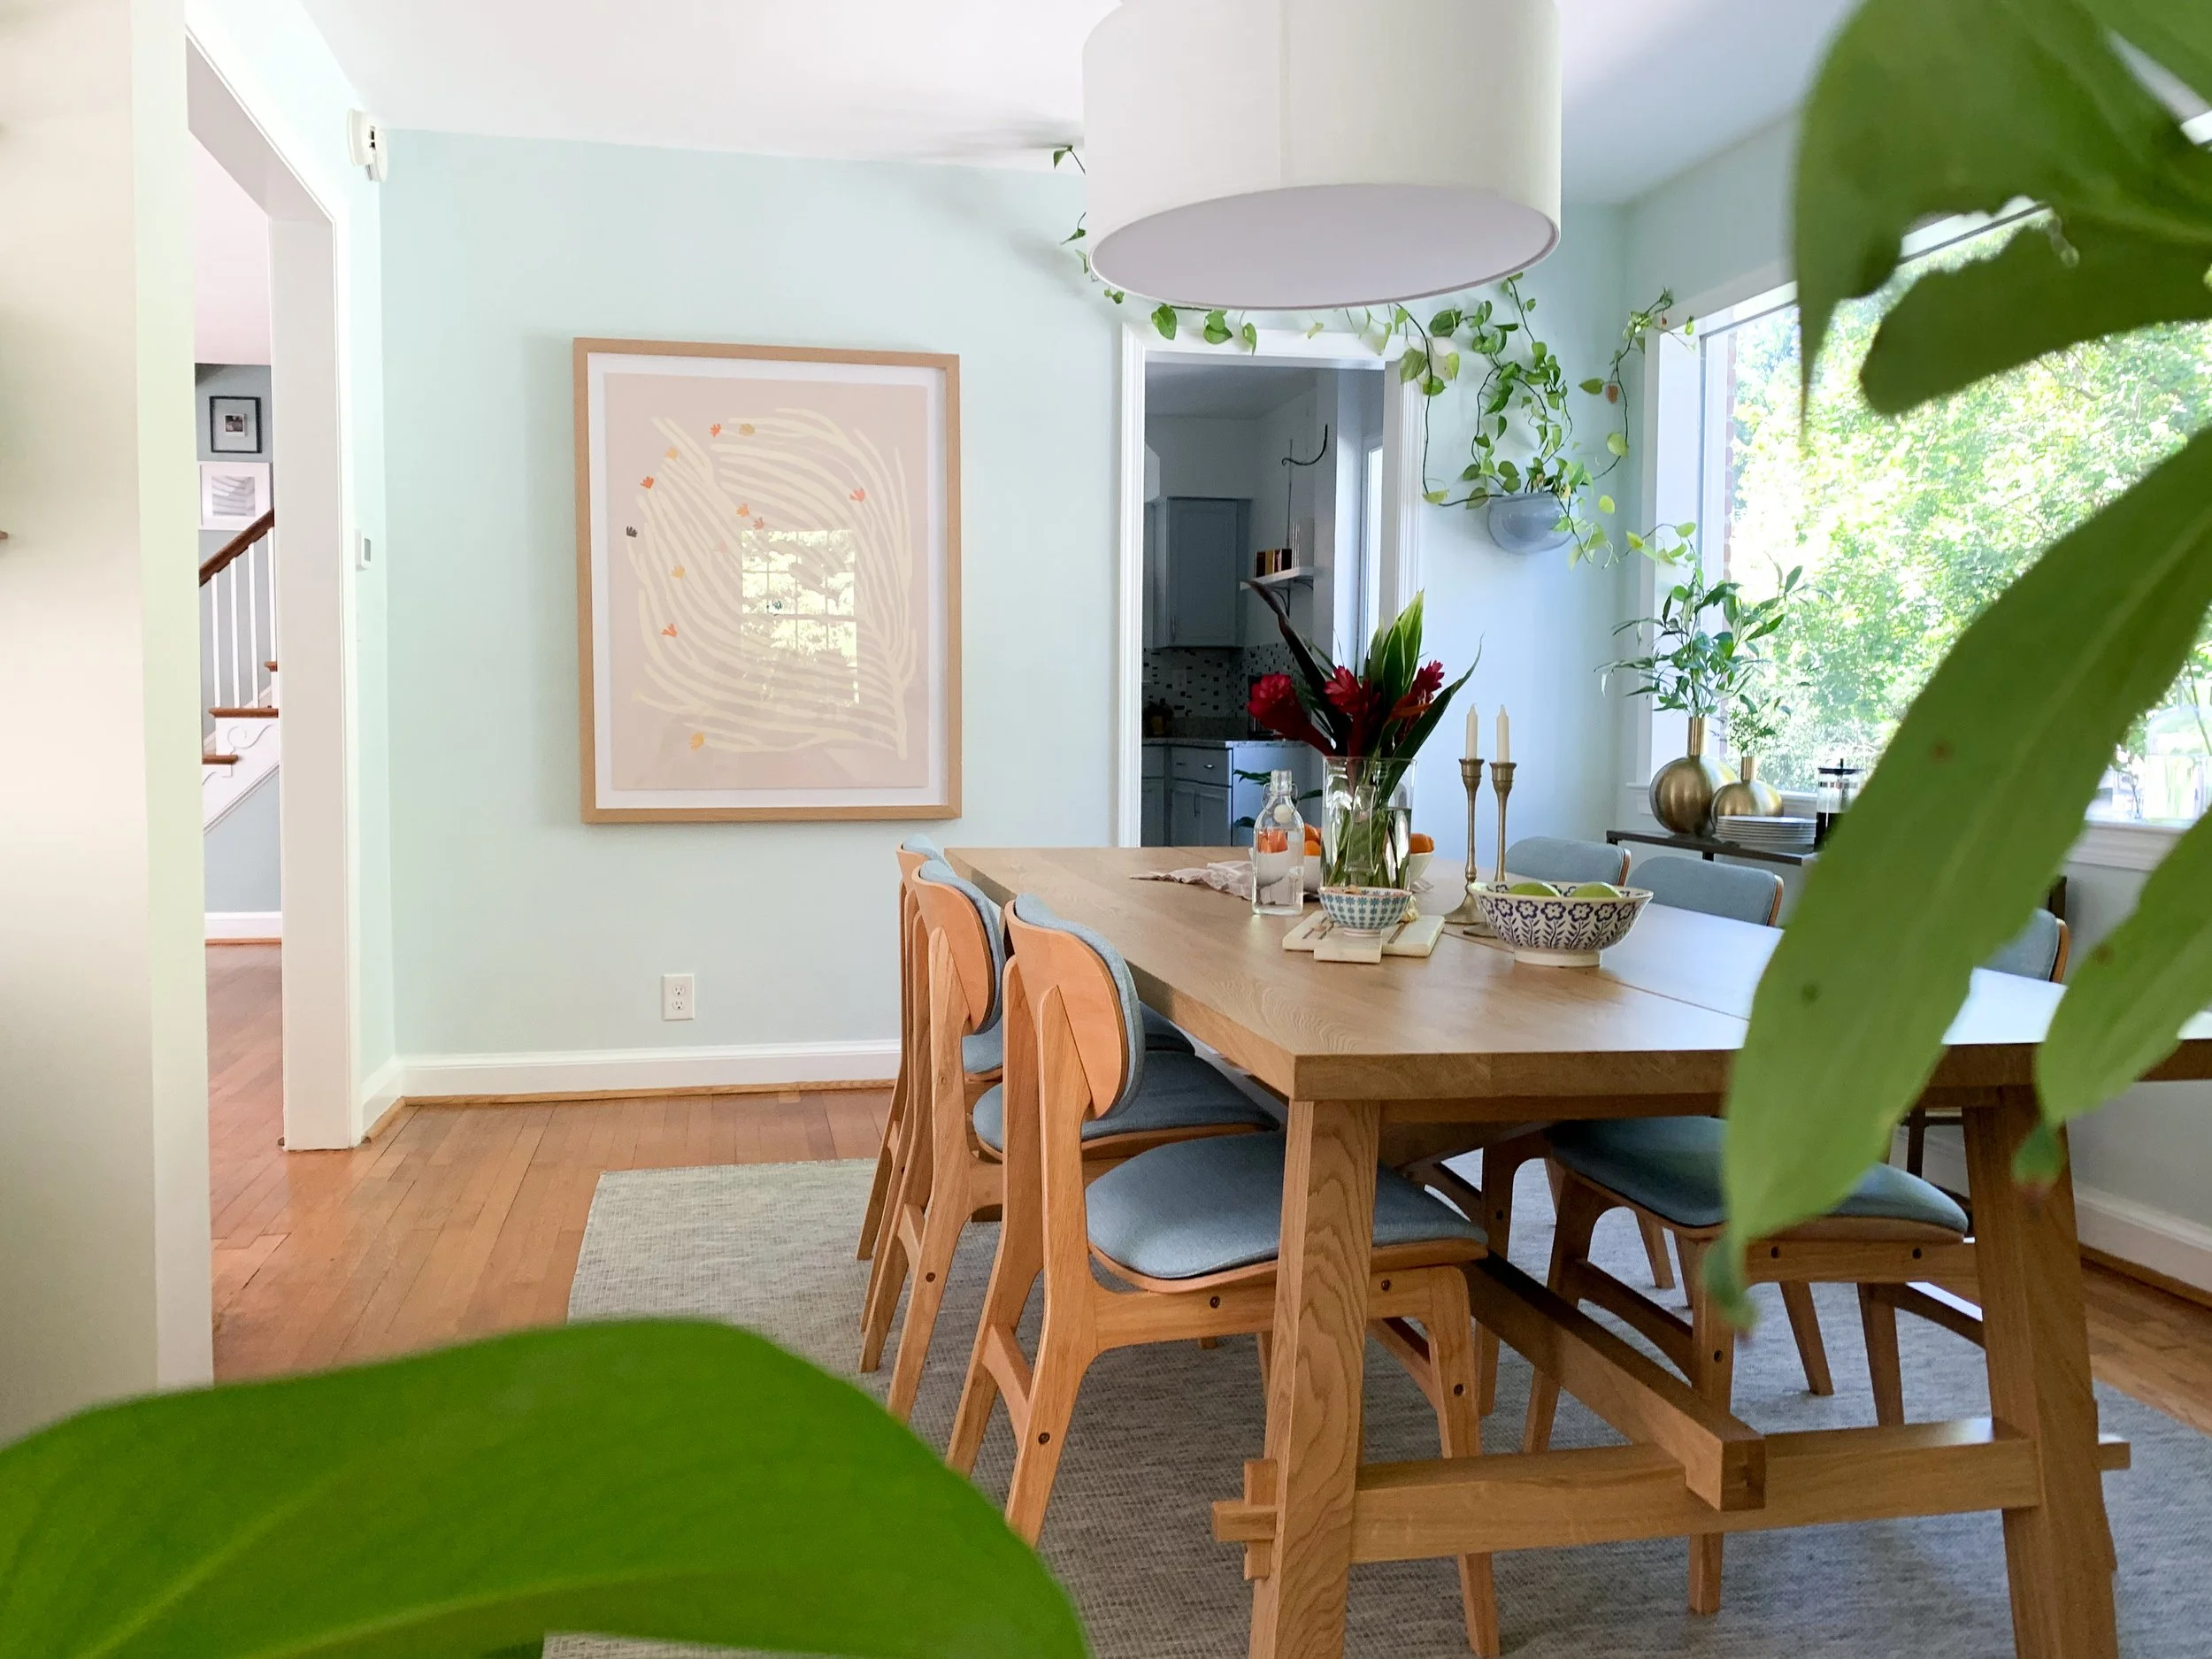
Phase 3: Sourcing and Implementing


After sourcing and ordering the furniture, decor, and art, I installed, decorated, and styled the living room, dining room, and adjoining area. I liked the idea of having more than one color on the walls, and to paint the bottom portion of the walls a muted blue and cap the color with a strip of green trim. This made the room feel interesting and unexpected, while still letting other elements shine through.
Quigley House Final Results


For more photos of Quigley House, you can check them out here.
To see my other projects with process details click here. Rather just see the completed work? Check out the Selected Projects page.